 Loading... Please wait...
Blog
April 18, 2015; New customer assembled kit photos, Combine 215/212
Posted on 18th Apr 2015
April 18, 2015
Saturday after Tax Day, done for another year, so back to trains!Thanks to all for the Facebook LIKES.
Recently I have collected some photos of cars built from Model Railroad General Store kits and I have been reading (and saving) some postings on various chat groups on the Internet.
I have wanted to share some of these and post some of my own kit builds to show a bit more than I have been able to show on the Model Railroad General Store (MRGS) web site or on Facebook. Juan Carlos Zaloaga, better known as "JC", has posted both comments and photos on the HOn3 Groups site on yahoo and they are most worth of repeating here.His build (1) and back dating (2) of the Combine 215/212 kit is suburb. So many really good changes and additions, just really great modeling and I'll repost photos and comments so any who missed them or might be curious on the kit build can benefit and enjoy.
I'm going to abbreviate Juan Carlos comments as "JC" as that is what he likes, and MRGS will stand in for Model Railroad General Store.Hope you will enjoy following along.
First, JC started with the basic MRGS 215/212 combine kit.This kit builds both the pre and post Pagosa Junction Combine, the one with the cupola, so 215 and 212 are correct car numbers.Read Colorado Rail Annual No. 25, Rio Grande Narrow Gauge Varnish, by Herbert Danneman for lots of information.The biggest single change was the addition of a Duck Bill roof to back date the car to circa 1890-1900.Other additions or changes were to replace the laser cut parts for the water stops (under window sills) with smaller styrene pieces. JC also replaced some of the plastic detail parts with brass castings from Tomalco as was his option.The brass parts for the end beams and railings as well as the steps will stand up to more abuse (handling) than the more fragile plastic parts; however, as it is a cost issue, it is up to the builder.
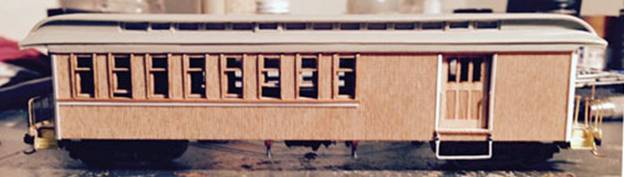
1 Here it is as 215 before cupola installed.
JC built the car with the provided roof, as is fitting for a post 1900 build, and as shown in many existing photos, then he decided to back date the car and installed the Duck Bill Roof.His solution was to carefully remove the exterior wood above the windows so the resin roof would fit over the car sides.If the car is assembled this must be done carefully so as to not destroy the car.If the decision to do this is early on, one must be careful not to lose the top window sash as it is held on by the top part of the car side.
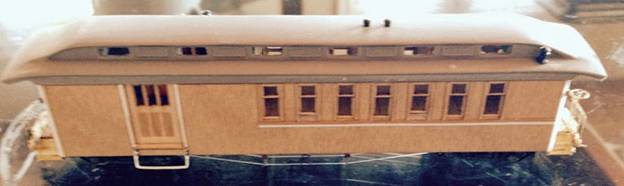
2With Duck Bill Roof, back dated circa 1900
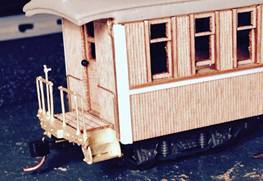
Just for comparison here's a photo of the passenger end of both builds, or the before and after roof change.Note; end beam, railings, steps, brake wheel, added cut lever and air break retainer valve.

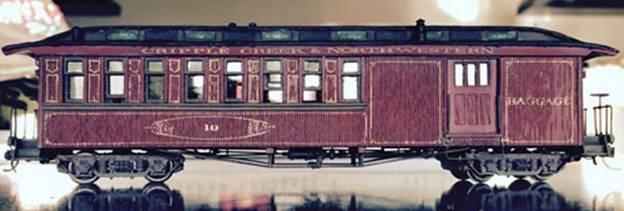
So here's the completed car, painted with pin striping and lettering.Really nice build, great job JC!!
If you have an in process or finished car, send your pictures and a brief description of any changes or modifications and I'll post them in future articles.Happy to have items to show case.
Thanks for your interest, John Vivian
Valentine's Special
Hi Guys: This is my first start on hopefully a weekly blog. Not always a special deal, sometimes tips or pictures or answers to questions. Meanwhile, here's a start and something to thank all for your Facebook likes, comments and visits. Keep coming back to see what is new and send us some pictures of [...]